
Welcome to My Digital Photography Blog
Hi! I’m Doug Sahlin, a best-selling author of digital photography books, and a professional photographer. I’ve had a love affair with photography that spans five decades. I feel more alive when I have a camera in my hands, and I’m more observant as well. In this blog I’ll post information about new products, my books, tips and tricks, and I’ll also share resources and my latest images. Please feel free to leave comments about my blog posts.
See the Differences
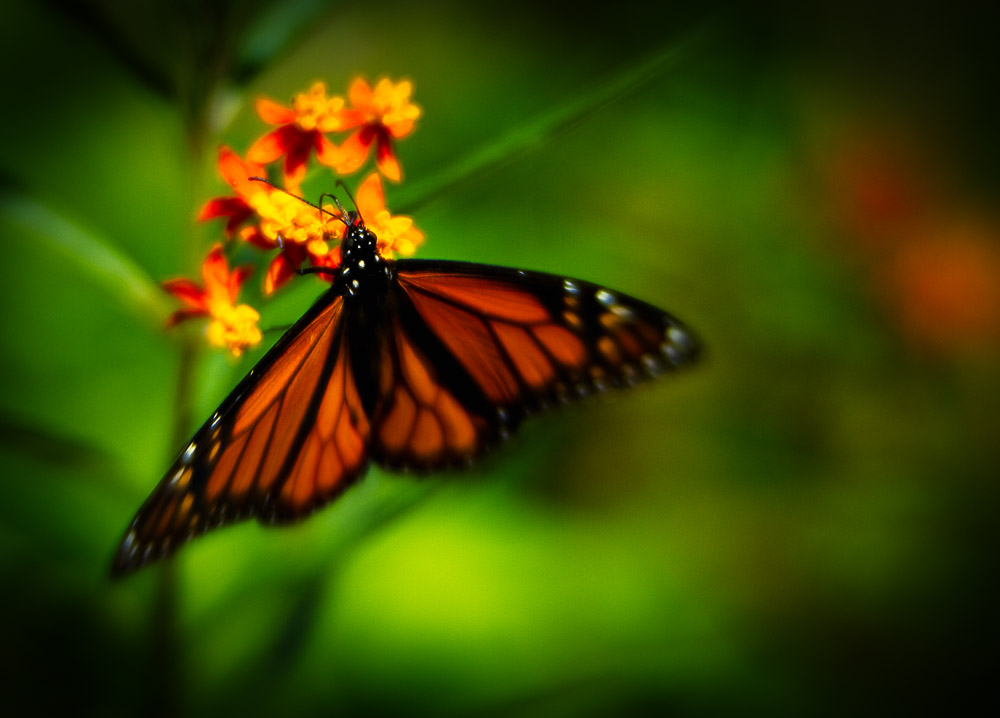
To create better photographs of nature, notice the differences. Nature doesn’t have any set patterns or rhythms, but there is a certain order to things. Tree trunks are brown and leaves are green. When you see something that’s different, focus your attention on it. It could be an orchid hanging from a tree. The tawny brown shape you see in the distance could be a bobcat.
Photography and Haiku
Good photography is like haiku. Less is more.


Thirteen Ways to Create Compelling Images
The goal of every serious photographer is to create the most compelling images possible; images that viewers give more than just a casual glance. Here are thirteen ways to achieve this goal:
- Pick the low hanging fruit first. When you see a scene or object worth photographing, take the first picture that comes to your mind. Then slow down and analyze what you’ve got. Move around until you see the composition that best captures your vision and take another picture. Repeat as needed.
- Simplify. Some photographers try to include too much information in a photograph. When you compose a photograph, see what’s in the viewfinder. If what you see is confusing, zoom in to remove some of the elements. Cut to the chase and simplify the image. Less is more.
- Wait for the light. Sometimes you’re in the right place at the wrong time. If the light is harsh (also known as “Sucky Light”), wait a few minutes for clouds to diffuse the sunlight, or come back when the light is better.
- Do something different. Einstein’s definition of insanity is doing the same thing over and over again and “look for an interesting shape that just happens to be a tree. You don’t have to photograph the entire object. Sometimes you find an interesting shape within an object. You can find interesting shapes everywhere.
- Look for patterns. Instead of photographing a forest or a group of flowers, look for an interesting pattern, or look for a break in a pattern.
- Notice what’s at the edge of the frame. When you look through the viewfinder, notice any elements at the edge of the frame that might distract your viewers’ attention such as brightly colored objects or bright spectral highlights. Bright areas give your viewers an escape route from your picture. When you see them, change the composition or zoom in until they disappear.
- Look around. Sometimes photographers get in too much of a hurry. They snap one picture and then move on. Take the picture that caused you to stop and then look around. Look up, down and behind you, and you’ll probably find something else that piques your interest. Take a picture of that and then look closer. Sometimes there’s a picture within a picture.
- Tell a story. Something made you stop to take a picture. Perhaps it was beauty, the color of the object, or the light. Take a picture that conveys that story to people who view your image.
- Move it. If you stop to photograph a scene or object that captures your attention, but take a picture and don’t like what you see on your LCD monitor, move to a different vantage point and take another picture. Repeat until you get something you like.
- Go with your heart and soul. Ignore the rules of composition. They’re guidelines. A photographer’s vision overrides the rule of thirds every time.
- Create images to seduce the viewers’ mind and eye.
- Create images that puzzle and intrigue viewers.
- Know the story you intend to tell before you take the picture.
Seeing Beyond the Label
Too many people categorize things. They see an oak tree instead of a beautiful shape that just happens to be called an oak tree. If you label everything you photograph, your pictures will suffer. If your goal is to photograph an “oak tree”, you’ll create a snapshot of an oak tree, a document that can be used for reference. But a documentary snapshot has no emotion or feeling. It doesn’t convey a mood to the viewer.
“I see no reason for recording the obvious.” Edward Weston
To create a wonderful photograph, you’ve got to look beyond the label and see what’s in front of you.
What excites you about the thing called an oak? Is if the curve of the trunk, the delicate shapes that make up the root system, the intricate filigree of branches, or perhaps a pattern of leaves in the tree. Instead of snapping a picture of a tree, slow down and really see what’s in front of you. Find out what excites you about the thing called an oak, and you have the basis for your photograph, or perhaps several photographs. When you can envision one or more images in your mind’s eye, you’ll know which camera settings to use, which lens to use, and which vantage point to shoot from to properly convey the feeling that compelled you to stop and take a picture. You’ll also know how to process the image in your favorite image-editing application to convey the mood to your viewers. See beyond the label and you’ll create better photographs.

Milking the Subject
After you take the picture you visualize in your mind’s eye, think of another photograph you can take of the same subject matter. Slow down and analyze the scene or subject matter and think of another way you can create an image. If you’ve photographed similar scenes, think outside of the box and photograph the scene or subject matter in a totally different way. Perhaps you can switch to a different lens, or photograph from a different vantage point.

The subject that caught my attention!

Same subject—Different vantage point.
If you’re photographing a landscape or architecture, walk around the scene and let your creative muse inspire you. One obvious choice is to look for a different vantage point. Shoot the scene from a snail’s eye view, or climb a tree or some steps for a bird’s eye view. Sometimes moving closer to your subject or moving left or right will give you a totally different picture. When you see something that looks good put the viewfinder to your eye. If it still looks good in the viewfinder, take a picture.
Tip:
Sometimes you can tell more than one story with a scene or a subject. Resist the temptation to tell them all in the same photograph. If you’ve got more than one story to tell, create more than one photograph. Use a different lens, or composition to tell a different story. When you try to tell too many stories with one image, more is less.
Finding the Extraordinary
You may feel that the subject matter is the person, place or thing that compelled you to stop and take a picture. It’s not. The image you create from what you consider ordinary requires feeling and emotion on your part. Your excitement and unique vision is what turns the ordinary into extraordinary photographs. Photography is all about story telling. You take the raw material before you, bring the viewfinder to your eye, compose what you see and create a photograph. But to extract the extraordinary from the ordinary first requires that you photograph something that has meaning to you, something that you love.
If you’re passionate about photography, your goal is to create images that have visual impact. When you create an image it’s the equivalent of saying, “This is important. Look at this.” You don’t have to travel halfway around the world to create images that have impact and tell a story. You can do so where you live.
“Creativity is piercing the mundane to find the marvelous.” — Bill Moyer”
Recent Comments